Is Permanent Makeup The End of Makeup As We Know It?
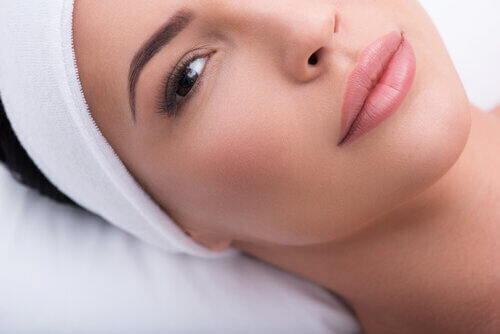
Have you ever passed that effortlessly beautiful girl while picking up your morning coffee or in your morning gym class? You want to know, “How do you look so great this early in the morning?” or “We’ve been sweating for 45 minutes and your eyeliner is perfect? How?” Pulling this off under normal circumstances would require a long, morning makeup routine followed by several touch-ups throughout the day.

The Secret To Always Looking Naturally Beautiful
Have you ever passed that effortlessly beautiful girl while picking up your morning coffee or in your morning gym class? You want to know, “How do you look so great this early in the morning?” or “We’ve been sweating for 45 minutes and your eyeliner is perfect? How?” Pulling this off under normal circumstances would require a long, morning makeup routine followed by several touch-ups throughout the day.
Topical makeup companies are constantly promising you longer-lasting eyebrow, eyeliner, and lip color. Words like waterproof, sweat-proof and smudge-proof crowd makeup packaging and sing to you during cosmetic commercials. You’ve tried it all, and some of it is certainly helpful, but nothing topical is truly all that you need.
The Real Answer: Permanent and Semi-Permanent Makeup.
Permanent or semi-permanent makeup is the only way to get perfect eyebrows, eyeliner and lip color all of the time, and that can last you years. It’s rapidly changing the way women view makeup.
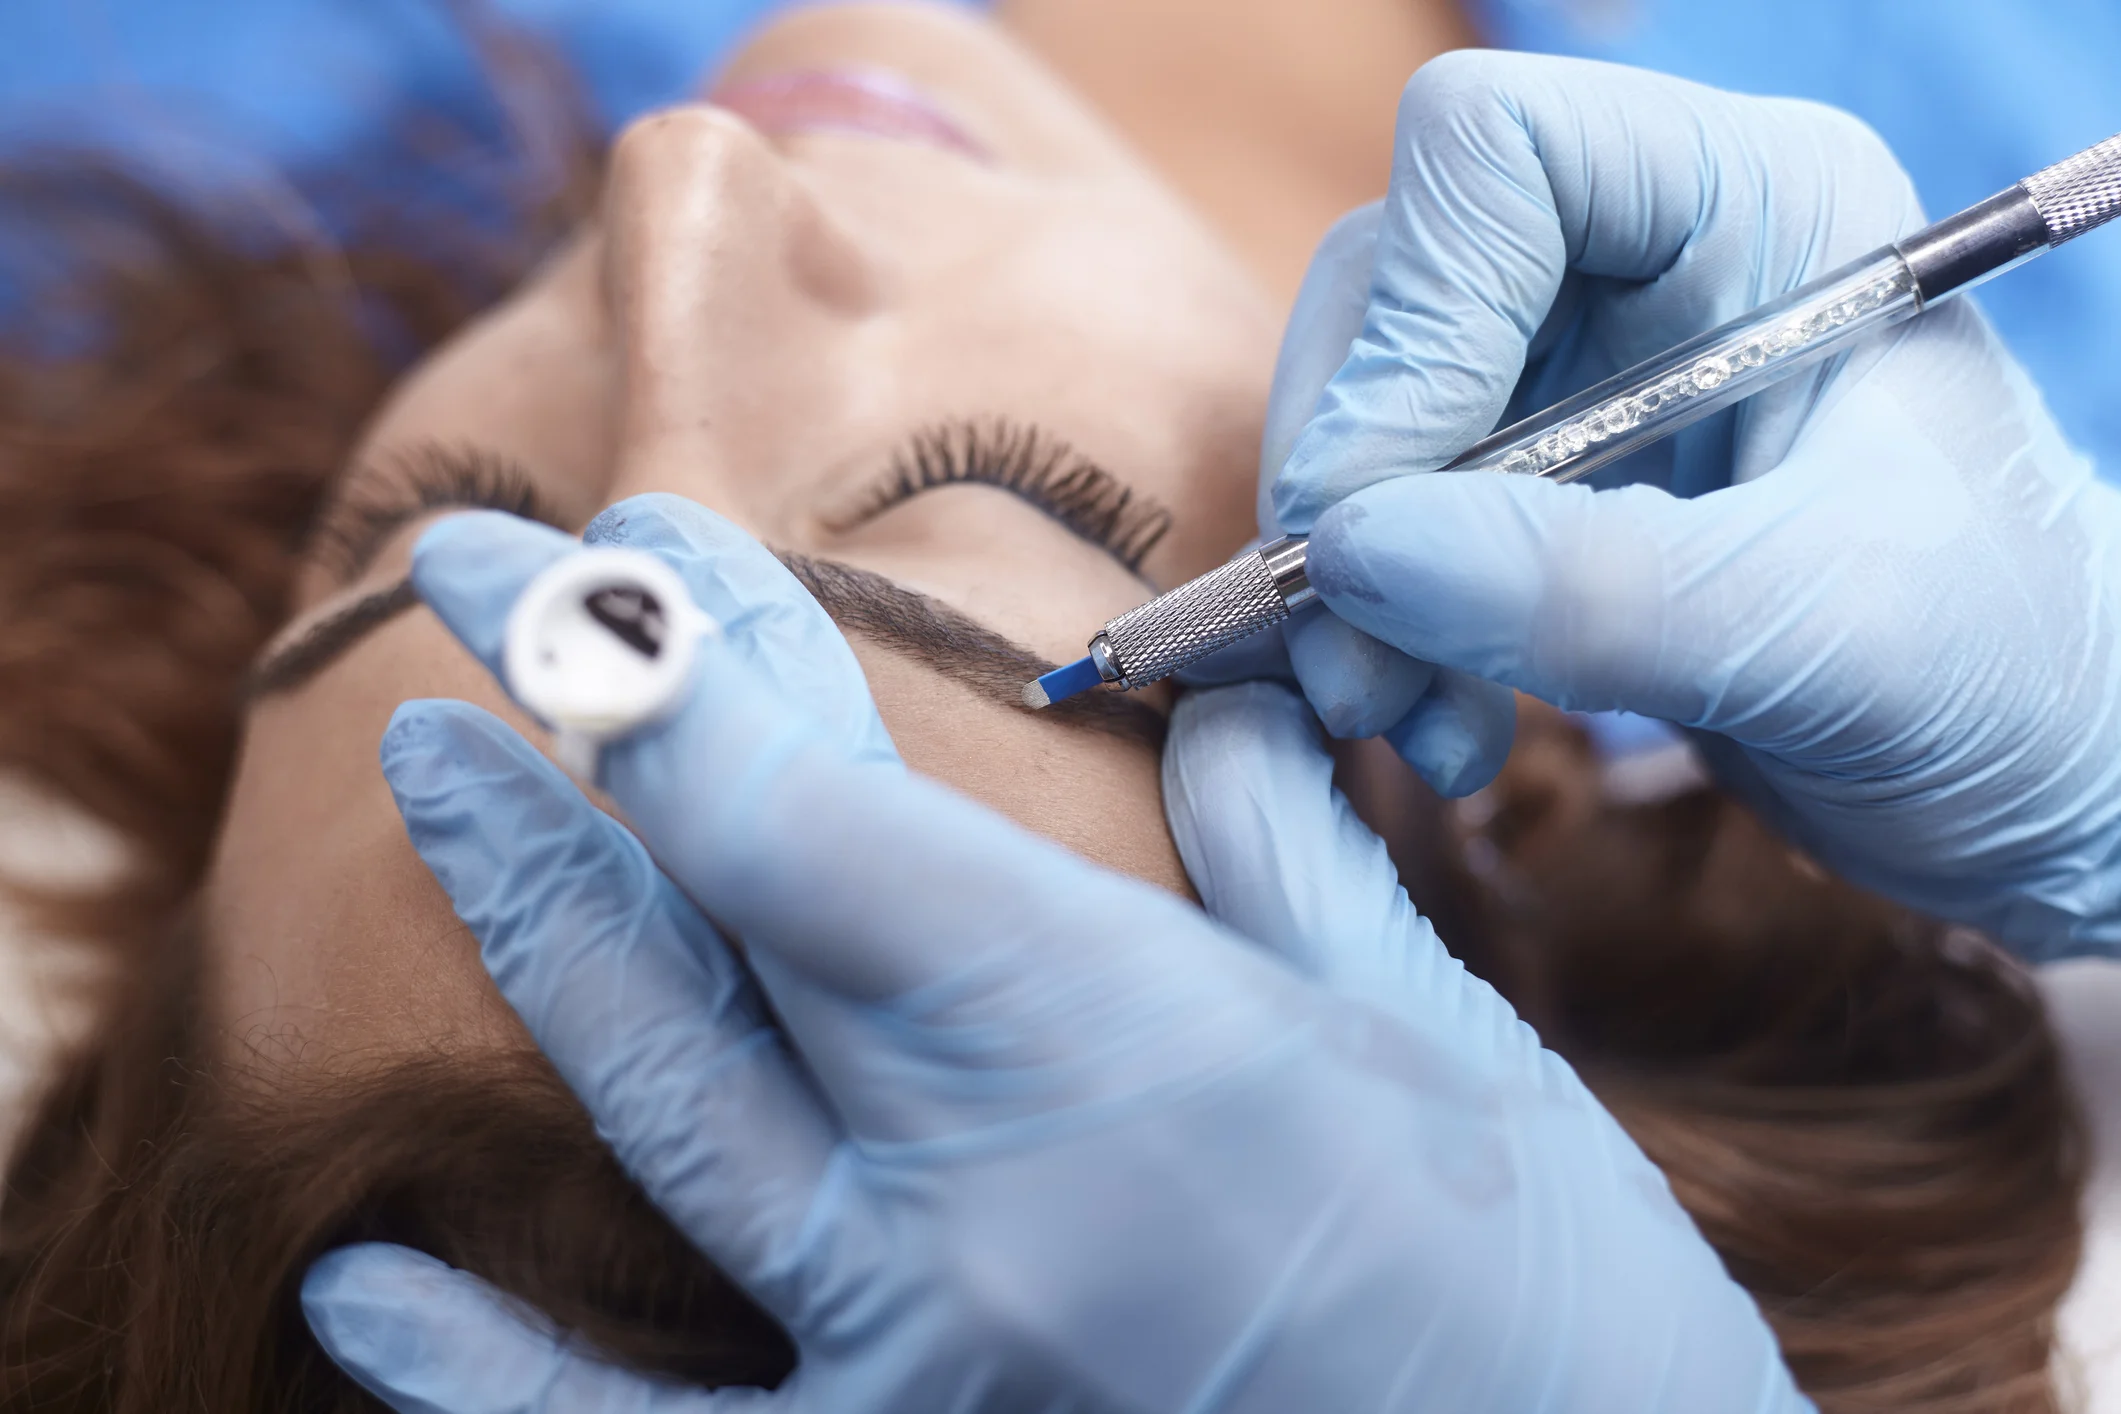
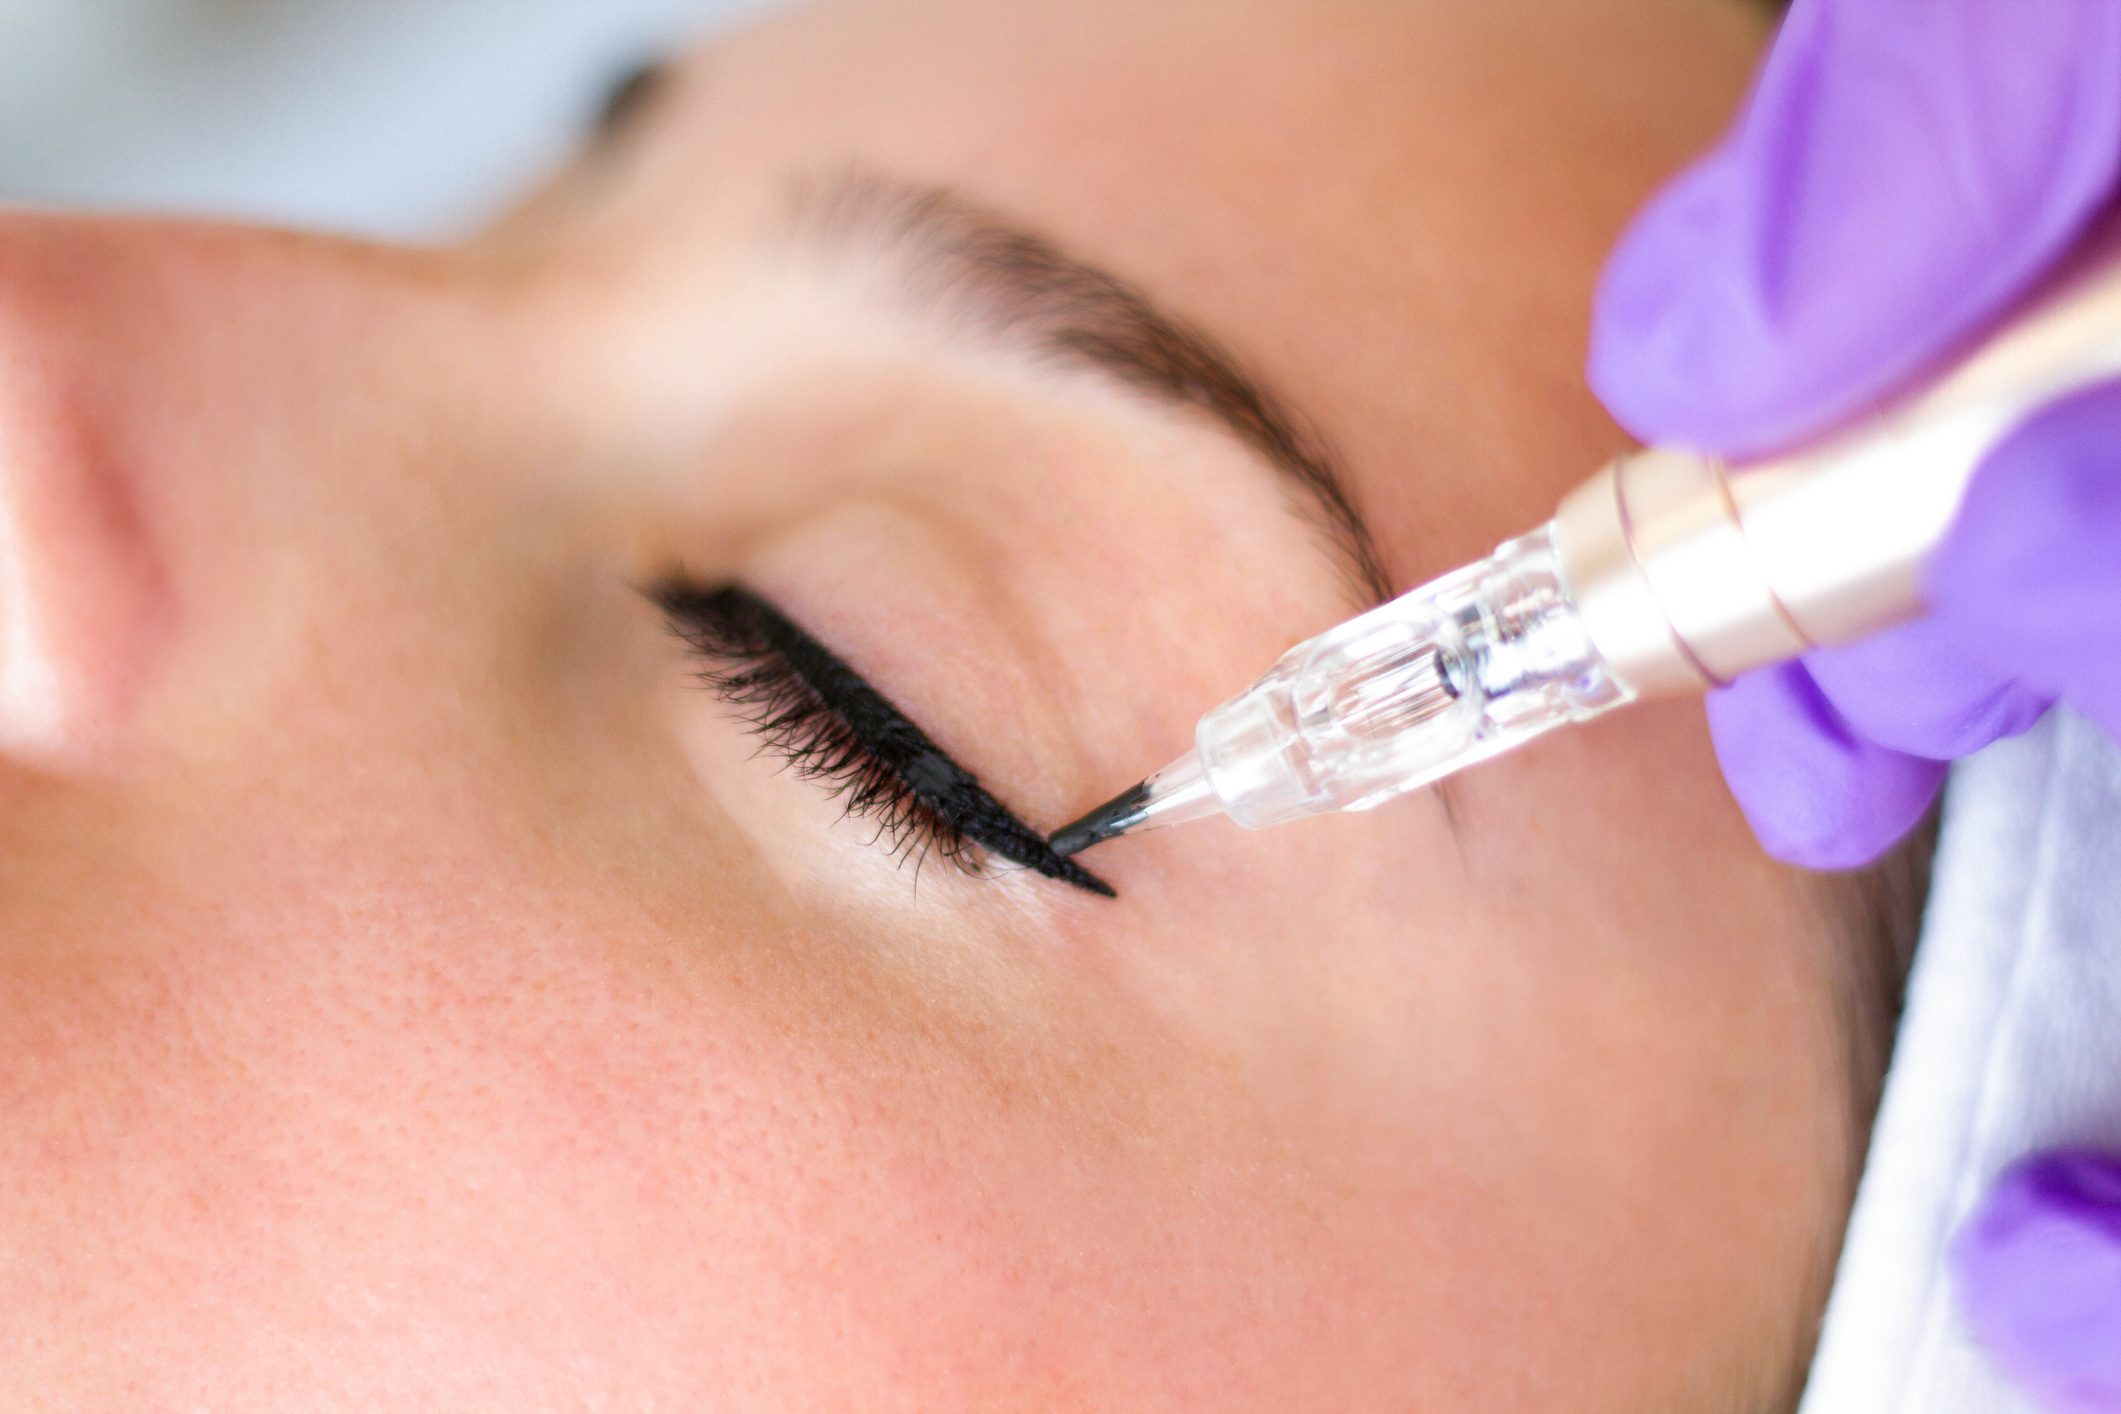
Permanent makeup technicians have perfected the technique. Using fine, nanoneedles, color is placed into your skin. This is a permanent application of makeup. You’re now free to live your life looking effortlessly beautiful.

“Permanent makeup is something to get when it becomes important for you to wake up looking ready to walk out the door.”
Permanent makeup is becoming as important to beauty maintenance as gel manicures or eyelash extensions.
Topical Makeup vs Permanent Makeup: Pros and Cons
Topical Makeup
Pros:
Temporary so you can change up your style daily
Fun to play with and collect
Cons:
It takes up a lot of time
You have to purchase makeup often
You can’t go out without it
It’s expensive
Requires practice
Permanent Makeup
Pros:
You won’t have to apply makeup for years
Your makeup is now sweat-proof, water-proof, and smudge-proof
You’ll save time every morning
You no longer need to shop for makeup
Long term you save money
Your makeup is guaranteed to be symmetrical
Cons:
More cost upfront
Requires an appointment
Can make you nervous
Will have 7 days of healing after your appointment
Looking To Try Microblading Permanent Eyebrows Without The Commitment?
The at-home, Waterproof Microblading Makeup Pen mimics microblading to temporarily create natural-looking hair strokes that blend in seamlessly with your own eyebrow hair.
We hope this has helped you to better understand Permanent Makeup and how it’s changing how we view makeup.
Microblading Gone Wrong: How To Avoid A Microblading Disaster
We’ve seen the “Microblading Gone Wrong” stories circulating the news and our social media. Naturally, we feel terrible for those who’ve fallen victim to bad microblading and at the same time we can’t help but worry that it could happen to us. We ask ourselves, “How could this microblading disaster have happened?,” and “How do I make sure I don’t end up with botched microblading?”

We’ve seen the “Microblading Gone Wrong” stories circulating the news and our social media. Naturally, we feel terrible for those who’ve fallen victim to bad microblading and at the same time we can’t help but worry that it could happen to us. We ask ourselves, “How could this microblading disaster have happened?,” and “How do I make sure I don’t end up with botched microblading?”

Are You Unhappy With Your Microblading?
How do Microblading Disasters happen?
To avoid a microblading failure, it’s best to first understand how microblading disasters happen. We see hundreds, and I mean HUNDREDS, of clients for bad microblading removal and/or shape and color correction every year and we’ve heard it all. “I never saw the shape before she did it,” “she promised the shape would look smaller after the procedure,” “She said that I needed to do the shape she wanted because she knows best.”
We hear “she said” after, “she said” from these unhappy clients. In a perfect world, all microblading artists would be operating honestly and in your best interest instead of theirs, (money, laziness, and ego.) Unfortunately, this too often is not the case so you need to make sure you are educated and not pushed around.

The Top 6 Reasons Microblading Goes Wrong
1. The microblading “artist” is untrained
Great microblading takes serious skill and every artist needs to be well trained to give you beautiful results. Some technicians are drawn to the microblading field because they’ve heard how much others are making and making money is all that they care about. They want to make as much as they can without spending their own money on proper training.
If an artist has been trained then she should be able to show proof of that training. Certificates are awarded to those who have completed training to the satisfaction of the school for a reason. Even online schools award proof of training.
Certification is unfortunately not required by the health department for an artist to work, which is why it is up to you to ask to see it.
2. The microblading artist didn’t draw for you
This is a big one. No artist, no matter how well trained, should be free handing microblading. A consultation is not enough to know exactly what you, the client, wants. Too often vocabulary and language will mean one thing to you and another to your technician. Just one of endless examples: Thicker can mean: a) more density, b) darker in color, c) wider in shape. The technician must outline the shape to be sure they understand you perfectly.
An outline is not only important to make sure you’re understanding each other, but an outline also prevents microblading mistakes. No artist is perfect, but the outline can be. Even the most experienced artist shouldn’t work without an outline. Sure, it could turn out okay, maybe even great if the artist is extremely experienced, but why risk it? You want guaranteed, beautiful eyebrows that you’ve pre-approved with your own eyes. Remember, an outline prevents microblading mistakes.
3. The microblading artist convinced you that the outlined shape would look smaller after the procedure
So you’ve found a certified microblading artist and she outlined for you. So far so good. Except, the shape looks too dramatic, or overall too big for your liking. What should happen at this point is that the artist adjusts the outline until it is exactly to your liking. What shouldn’t happen is that the artist convinces you that this shape will become somehow smaller after the procedure is done or healed. If the artist sticks to the outline, which she should, then the size of the brow does not become smaller.
Sometimes the darkness of the outline can make the shape feel larger than it is, especially if you are light-haired and the artist is using a dark pencil. The size, however, is true. Ask for a smaller shape if you are uncomfortable, it is easy to add and difficult to take away.
4. You chose an artist based on price alone
You’ll probably do some research on the price of microblading while looking for an artist. What you’ll usually notice is a wide range of prices. Finding a good artist within your budget is smart, but choosing an artist based on the lowest price alone is the quickest way to end up with botched eyebrows. Beware of an artist with heavily discounted prices.
In the microblading world, cheap means the artist either is not very good, and therefore isn’t able to charge an average or above price, or they are brand new and need practice models. New artists are told to charge low prices to get as much practice as they can. Don’t let this happen to you.
There is a very small chance that you can get extremely lucky and find a gifted new artist at a low price. I’ve certainly come across some gifted students, but I can not tell you how rare this is and you can count on her raising her prices soon.
5. You didn’t see before and after photos or have a referral
Not seeing your artist’s work before your appointment is a recipe for disaster, and we’ve seen the results time and time again. Even if the microblading is done well it may be a style that you aren’t fond of and are now stuck with for a long time. I’ve personally removed beautiful work done in a style that was just not what the client wanted. The worst-case scenario is of course that the work is not done well at all, regardless of the style.
When choosing a microblading artist, a referral is great. Nothing beats being able to see an artist’s healed results on someone in person and then being able to get their opinion on their artist. Since a referral is not always easy to find, request to see several before and after photos of the artist’s work before booking your appointment.
6. You have an uneasy feeling when meeting the artist
Nerves are common for any new client. We see it often, but there is something to be said for that gut feeling or intuition about a person or place. You are subconsciously picking up vibes from your surroundings. You may not know exactly why, but something about the way this technician is speaking to you is making you uneasy. Something feels off about this studio.
Sometimes it’s obvious, like it was for client Sharon Baily, “I walked in for my appointment and noticed an empty coke can just sitting on the front desk amongst some other clutter. I could tell it had been there for a long time. Then the girl came out, a bit late an out of breath, and she was speaking so fast, I could hardly understand her. I could tell she wanted to do this quick and she kept trying to get me to go in a back room with her when I still had questions. I felt really bad at the time but I had to tell her that I just wasn’t feeling right about having the appointment today and I left even though I’d paid and lost the deposit.”
Never feel pressured to stay for an appointment if you’ve decided this isn’t the artist for you. It’s easy to feel the social pressure to not abandon the appointment but this can result in microblading mistakes that last years.

How can I make sure I won’t end up with botched Microblading?
So here’s your cheat sheet to avoid a microblading fail and leave with the eyebrows of your dreams:
Seek out a trained and certified microblading artist.
Approve the outline before the procedure begins.
Choose the best artist based on their work, not price.
Trust your intuition. If something doesn’t feel right, it probably isn’t.
Looking to Try Out Different Eyebrow Shapes At Home Before Your First Appointment?
The Eyebrow Stencils Set For Eyebrow Shaping & Outlining allows you to try 12 of the most popular and flattering eyebrow shapes at home.
Microblading Healing Process: Everything You Need To Know
If you are in good health, you should be pleasantly surprised at how easily and quickly your microblading heals. We’re going to go over how your microblading will look as it’s healing and the two most common and popular methods of microblading aftercare.

The Microblading Healing Process Is Quicker Than You Think
If you are in good health, you should be pleasantly surprised at how easily and quickly your microblading heals. We’re going to go over how your microblading will look as it’s healing and the two most common and popular methods of microblading aftercare.
The Microblading Healing Process Day By Day
Day 1: You’ll love your new eyebrows!
The color is perfect and the shape is everything you’ve dreamed of.
Days 2-4: Your color will darken slightly and temporarily.
This is because the fresh color goes through a period of oxidation. This does not last longer than 7 days and is minimal. You should not experience heavy scabbing. Any scabbing will be thin and light. You should feel comfortable going to work the very next day.
Days 5-7: Your microbladed eyebrows begin to flake as part of the healing process.
This lasts 1-2 days. You want to avoid picking or itching your brows.
Days 8-10: Flaking has finished and you will feel fully healed.
You finally treat your eyebrows normally. Keep in mind that even though your eyebrows feel normal, your skin is technically still in the healing process. Your eyebrows will temporarily look lighter than they will when fully healed at 6 weeks. This is because you have new, baby skin and it needs a few more weeks to finish healing.
Days 14-28: Your eyebrow color and shape has fully bloomed.
The color and shape should be just right and soon you will be invited back for your follow-up appointment.
Day 42: It’s time for your follow up.
During your follow up you have the opportunity to adjust anything you’d like about your new eyebrows. Sometimes clients are nervous during their initial service and later wish they had gone darker or fuller. This is your opportunity to make sure you are 100% in love with your beautiful new brows.
Aftercare: Microblading Dry Healing vs Wet Healing
Here are the two most popular microblading post care methods:

You’ll clean your microblading every 15 minutes to 1 hour immediately following the procedure using cotton pads and water.
Dry Healing
Dry Healing predates Wet Healing. It’s how microblading artists used to have their clients heal, and how some still do today. Dry Healing is exactly how it sounds. You don’t get your microblading wet, ever. After your microblading appointment you do not touch your eyebrows. You let your eyebrows heal on their own with no assistance.
PROS: There’s nothing for you to do and no aftercare kit required.
CONS: You’ll have heavy scabbing during healing and you’ll lose more color.
Wet Healing
Wet healing is how most microblading artists have their client’s heal today. Your microblading artist will have you clean your eyebrows every 15 minutes to 1 hour following your appointment. Depending on your artist’s preference, you’ll do this for 1 to 3 days.
You’ll also be asked to clean your eyebrows morning and evening with a gentle, permanent makeup-approved cleanser and told to use an appropriate healing gel to keep your skin from drying out.
PROS: You’ll have no scabbing and your color will heal much more evenly.
CONS: You’ll have some work to do and an aftercare kit to keep on you.
Dry healing is still a common method even though wet healing has proven to have the most promising healed results. You can speak with your artist about their healing method and what they’d like from you when healing.
Wet healing is the #1 way to achieve your best Microblading results
What You Need For Your Microblading Wet Healing Aftercare
Wet healing is the #1 way to achieve your best Microblading results. Here are the top aftercare items you’ll need.
Cotton Pads
You’ll clean your eyebrows every 15 minutes immediately following the procedure using cotton pads and water.
Microblading Approved Cleanser
You’ll use your cleanser to wash your microblading morning and evening.
Microblading Healing Gel
Microblading gel is specially formulated to help your eyebrow color heal with longer-lasting and more brilliant color.
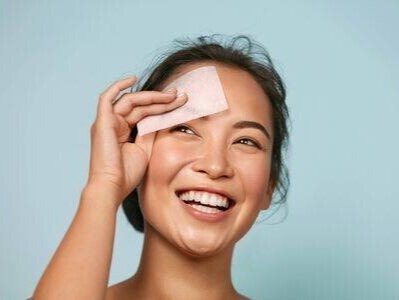
Eyebrow Blotting Pads
If you have oily or combination skin then you should be using blotting pads to soak up excess oil. This will help your microblading to heal with more color.
Are You Unhappy With Your Microblading?
Eyebrow Tattoo Healing Process & Aftercare
Your eyebrow tattoo healing should go by easily and smoothly as long as you are healthy and you follow the aftercare given to you by your permanent makeup artist. We’re going to cover how your eyebrow tattoo will look as it’s healing and the two most popular methods of eyebrow tattoo aftercare.

Eyebrow Tattoo Healing is Not Bad, Promise
Your eyebrow tattoo healing should go by easily and smoothly as long as you are healthy and you follow the aftercare given to you by your chosen permanent makeup artist. We’re going to cover how your eyebrow tattoo will look as it’s healing and the two most popular methods of eyebrow tattoo aftercare.
How Your Eyebrow Tattoo Healing Will Look Day By Day
Day 1: Your new eyebrows are gorgeous and you couldn’t be happier!
The color is exactly what you hoped and the shape is perfect.
Days 2-4: You’ll notice that your color has darkened slightly, this is only temporary.
This is because the fresh color has oxidized, and it will last up to 7 days. Scabbing should be so thin and minimal that you feel comfortable going to work the very next day.
Days 5-7: Your microbladed eyebrows will begin to flake.
This is a natural part of your skin’s healing process and you’ll want to avoid picking or itching. This typically lasts 1-2 days.
Days 8-10: Your flaking has finished and you will feel fully healed.
You can now treat your eyebrows normally. Even though your eyebrows and skin feel normal now, you’re still undergoing the healing process. This means that your eyebrows will for a time look lighter than they will when completely healed at 6 weeks. The reason for this is that at first you will have new, baby skin and it will need several more weeks to finish healing.
Days 14-28: Finally your eyebrow tattoo has fully healed.
You should love the color and the shape should be exactly right. Soon you will be returning for your eyebrow tattoo follow up appointment where your artist will see how you’ve healed.
Day 42: You can return for your follow up.
Your follow up is your chance to ask your artist to make any adjustments you’d like. If you were nervous during your initial service and, and you wish you had gone darker or fuller, now is the time to make your improvements. You should leave completely in love with your new eyebrows.
Permanent Eyebrow Tattoo Aftercare: Wet Heal vs Dry Heal
There are two popular methods that permanent eyebrow tattoo artists use. We’ll tell you everything you need to know about each of them.
Dry Heal
Dry healing has been around longer than wet healing. It’s an older method and how many artists have their client’s still heal today. With dry healing, you won’t get your permanent eyebrows wet, exactly as it sounds. After your appointment, you will let your eyebrows heal on their own with no assistance
PROS: There is no aftercare kit required and there’s nothing for you to do.
CONS: You’ll lose more color and have to deal with heavy scabbing.
Wet Heal
Most eyebrow tattoo artists today have their client’s wet heal. Your artist will have you wipe your eyebrows every 15 minutes to 1 hour after your appointment. You’ll do this for 1 to 3 days depending on your artist’s preference and your skin type. You’ll also use a healing gel to keep your skin hydrated.
PROS: You won’t have scabbing and your color will heal more evenly.
CONS: You’ll have an aftercare kit to keep on you and a bit of hands-on work to do.
Dry healing is still a common method even though wet healing has proven to have the most promising healed results. You can speak with your artist about their healing method and what they’d like from you when healing.
We recommend wet healing if you want to achieve your best eyebrow tattoo results
What You Need For Your Eyebrow Tattoo Wet Healing Aftercare
We recommend wet healing if you want to achieve your best eyebrow tattoo results. Here are the top aftercare items you’ll need.
Cotton Pads
You’ll clean your eyebrows every 15 minutes to 1 hour immediately following the procedure using cotton pads and water.
Permanent Eyebrow Tattoo Cleanser
You’ll use your cleanser to wash your eyebrows morning and evening.
Permanent Eyebrow Tattoo Healing Gel
Eyebrow tattoo healing gel is specially formulated to help your eyebrow color heal with longer-lasting and more brilliant color.
Eyebrow Blotting Pads
If you have oily or combination skin then you should be using blotting pads to soak up excess oil. This will help your eyebrow tattoo to heal with more color.

Are You Unhappy With Your Microblading?
Permanent Eyeliner Aftercare: Everything You Need to Know
The permanent eyeliner healing process is known to be the easiest of all permanent makeup healing. That probably comes as a surprise. As long as you are in good health, you can expect swift, easy healing. We’re going to go over how your permanent eyeliner will look as it’s healing and the two most common and popular methods of permanent eyeliner aftercare.

Permanent Eyeliner Aftercare is Actually Pretty Easy
The permanent eyeliner healing process is known to be the easiest of all permanent makeup healing. That probably comes as a surprise. As long as you are in good health and have chosen the right artist, you can expect swift, easy, and safe healing. We’re going to go over how your permanent eyeliner will look as it’s healing and the two most common and popular methods of permanent eyeliner aftercare.
What to Expect After Permanent Eyeliner: Healing Schedule Day by Day
Day 1: You’ll love your new eyeliner!
Your eyeliner color is approximately 30% darker than it will be when it’s healed. It will also appear slightly larger than it will heal in just a few days. This is due to color oxidation as well as a small amount of swelling and it is a normal part of your healing process. You will have no trouble driving home and going about the rest of your day normally. It’s unlikely that anyone will notice you’ve had your eyeliner permanently done except for possibly those you know very well.
Days 2-3: Your color will darken temporarily as the pigment oxidizes and thin scabs will form.
You may wake up slightly puffy but you can remedy this by sleeping on an incline or applying a cool compress. Your eyeliner will feel tight and dry, but not painful.
Days 3-5: Your eyeliner will begin flaking until there is no scabbing left.
You want to allow healing to shed naturally. Once all scabbing has finished flaking, it is common for the color to appear lighter than it will eventually heal. This lighter color is only temporary as your freshly healed skin is hiding the true color underneath. Over the next several weeks your eyeliner color will bloom.
Day 42: At 6 weeks your eyeliner is fully healed.
It’s now okay for you to come back in for your follow up. Any adjustments such as darkening the color or altering the shape can be done at this appointment.
Permanent Eyeliner Aftercare: Wet Healing vs Dry Healing
Here are the two most popular aftercare methods that permanent eyeliner artists are using:
Dry Heal
Dry healing was the most popular before wet healing existed. Dry healing is how it sounds. You’ll keep your permanent eyeliner dry at all times. After your permanent eyeliner appointment you won’t touch your eyeliner at all. You’ll let your eyeliner heal on its own.
PROS: There’s nothing for you to do and there’s no aftercare kit required.
CONS: You’ll have heavy scabbing during healing and your color won’t heal evenly.
Wet Heal
Wet healing is how most permanent eyeliner artists have their client’s heal today. Your artist will have you clean your eyeliner every 15 minutes following your appointment. Depending on your artist’s preference, you’ll do this for 2 to 3 days. You’ll also use an eyeliner healing gel to keep your eyeliner from drying out.
PROS: You’ll have no scabbing and your color will heal much more evenly.
CONS: You’ll have some work to do and an aftercare kit to keep on you.
Dry healing is still a common method even though wet healing has proven to have the most promising healed results. You can speak with your artist about their healing method and what they’d like from you when healing.
Wet healing is the #1 way to achieve your best Permanent Eyeliner results.
What You Need For You Permanent Eyeliner Wet Healing Aftercare
Wet healing is the #1 way to achieve your best Permanent Eyeliner results. Here are the top aftercare items you’ll need.
Cotton Pads
You’ll clean your eyeliner every 15 minutes immediately following the procedure using cotton pads and water.
Permanent Eyeliner Cleanser
Gently cleanse your eyeliner daily with an approved permanent makeup cleanser.
Permanent Eyeliner Healing Gel
Permanent eyeliner healing gel is specially formulated to help your eyeliner color heal with longer-lasting and more brilliant color.
Eyeliner Blotting Pads
If you have oily or combination skin then you should be using blotting pads to soak up excess oil. This will help your eyeliner heal with more color.
Permanent Lip Color Healing Process: Everything You Need to Know
While it’s normal to have some initial swelling after having your lip color tattooed, as long as you are in normal health, you should be pleasantly surprised at how easily and quickly your lips heal. Proper aftercare will affect how long your permanent lip color lasts. We’re going to take a look at how your permanent lipstick will look as it’s healing, and the two most common and popular methods of lip blushing aftercare.
Your Permanent Lip Color Healing Should Feel Easy
While it’s normal to have some initial swelling after having your lip color tattooed, as long as you are in normal health and, have chosen the right artist for you, you should be pleasantly surprised at how easily and quickly your lips safely heal. Proper aftercare will affect how long your permanent lip color lasts. We’re going to take a look at how your permanent lipstick will look as it’s healing, and the two most common and popular methods of lip blushing aftercare.
How Your Lip Color Will Heal
Days 1-2: You love your new lip color!
Your lip color will appear brighter than it will heal. Your lips will also feel swollen and tender. Your color will begin to darken temporarily throughout the day as the pigment oxidizes.
Days 3-14: Swelling will have finished.
Your lips will feel dry and start the flaking process. Allow shedding to happen naturally. As your lips flake, it will appear that your lip color is very light and "frosty". This is only temporary as you are still healing. Over the next several days your lip color will reappear until it fully blooms.
Days 28-42: It’s time for your follow up.
By this time your lips are fully healed and it’s recommended that you come back in to touch up any color that might have healed too light or at all imperfectly. Applying a second layer of new color will build off of your previous color, creating a more saturated and longer-lasting lip. During this appointment, you also have the opportunity to further adjust the shape if desired.
Permanent Makeup Lips Healing Aftercare: Wet Heal vs Dry Heal
Here are the two most favored aftercare methods that permanent lip blushing artists are using everywhere:
Wet Heal
Wet healing is how most permanent lip color artists have their client’s heal today. Your artist will have you blot your lips with cotton pads every 15 minutes following your appointment. You’ll do this for 3-5 days depending on your artist’s preference. You’ll also use a lip color healing gel to keep your lips from drying out.
PROS: You’ll have no scabbing and your lip color will heal much more evenly.
CONS: You’ll have some work to do and an aftercare kit to keep on you.
Dry Heal
Dry healing’s been around longer than wet healing. It’s how all permanent lip color artists used to have their clients heal, and some still do. Dry Healing is precisely how it sounds. You don’t get your permanent lip color wet during healing, ever! After your appointment you do not touch your lips. You let them heal on their own with no assistance.
PROS: There’s nothing for you to do and no aftercare kit required.
CONS: You’ll have heavy scabbing during healing and you’ll lose more color.
Dry healing is still a common method even though wet healing has proven to have the most promising healed results. You can speak with your artist about their healing method and what they’d like from you when healing.
Wet healing is the #1 way to achieve your best Permanent Lip Blushing results
What You Will Need For Your Wet Healing Aftercare
Wet healing is the #1 way to achieve your best Permanent Lip Blushing results. Here are the top aftercare items you’ll need.
Cotton Pads
You’ll clean your lip color every 15 minutes immediately following the procedure using cotton pads and water.
Permanent Lip Blushing Cleanser
Safely clean your lip color morning and evening with a permanent makeup approved cleanser.
SPF 30 Lip Balm
Permanent lip blushing will fade if exposed too early to the sun. It is suggested to apply an SPF 30 lip balm for up to 1 month after all flaking has finished.
Permanent Lip Blushing Healing Gel
Permanent lip blushing healing gel is specially formulated to help your lip color heal with longer-lasting and more brilliant color.

Microblading Oily Skin: How Different Skin Types Affect Microblading
Your skin type is important when it comes to microblading. It plays a major role in how your microblading will heal and the rate at which it will fade. When referring to “skin type” for microblading, we are talking about how dry and/or oily your eyebrow area is and your pore size. There are four common skin types that you can have: normal, dry, oily, or combination. Your skin’s sensitivity is also an important factor, although it is technically not a “skin type”.
Why Your Skin Type Matters For Microblading
Your skin type is important when it comes to microblading. It plays a major role in how your microblading will heal and the rate at which it will fade. When referring to “skin type” for microblading, we are talking about how dry and/or oily your eyebrow area is and your pore size. There are four common skin types that you can have: normal, dry, oily, or combination. Your skin’s sensitivity is also an important factor, although it is technically not a “skin type”.
We are going to be paying particular attention to the oily skin type since one of our most commonly asked questions is “can I get microblading done if I have oily skin?” But first, before we get into microblading on oily. Let’s look at how it compares to the other types.

Overview of Skin Types and How They Heal
Normal Skin
You may have normal skin type if you are not prone to breakouts and your t-zone stays hydrated. Your t-zone is across your brows horizontally, and down the center of your face vertically
The normal skin type will heal very evenly and the color will last the average length of time. You can expect to go 1 to 1.5 years before a touch up becomes necessary.
Dry Skin
You may have dry skin if your pores are nearly invisible, and your skin often feels tight throughout the day. You may also notice some flaking from time to time.
Dry skin types will heal very clean. This is true for all permanent makeup done on dry skin and it is especially true for microblading. Microbladed hair strokes will heal very crisp. Dry skin will also retain color the longest amount of time, usually 1.5+ years. The reason for this is that fewer oils are coming through the skin so the pigment is not diluted, or does not fade, as quickly.
Combination Skin
Combination skin will feel hydrated throughout your t-zone. Your t-zone is across your brows horizontally, and down the center of your face vertically. Your cheek area will feel drier and may experience some flaking.
Combination skin tends to heal like normal or slightly oily skin since it is common for the eyebrow area to be on the oilier side. For all other permanent makeup (eyeliner, lips) skin will heal like the normal skin type.
Sensitive Skin
Clients with sensitive skin will know that they have sensitive before they come in. If you are unsure then you probably do not have sensitive skin.
We’ve added this category because this skin type does heal differently than others. Someone with sensitivity may experiences slight pinkness that can last several days, or weeks, longer than it would for other types. They also may experience some slight swelling on the day of the procedure which is not typical for other skin types.
Oily Skin
Oily skin is naturally more hydrated and supple. It tends to age very nicely however excess oil may clog pores more quickly. Very oily skin is also prone to larger pores.
Oily skin will heal the most soft. microbladed hair strokes will heal more powdery as opposed to the dry skin type for example who’s microblading will heal very crisp. How oily your skin is will make a difference. Slight oiliness will heal more like normal skin, while extremely oily skin will heal much softer and the color will be more spread out. A well-trained microblading artist will know to place the strokes farther apart on a client with oily skin to minimize how much the hair strokes spread into each other once healed.
Color Retention And Healing of Skin Types
Let’s cut to the chase… Can I Have Microblading Done With Oily Skin?
The answer is technically yes. You can have microblading done if you have oily skin. However, you’ll want to keep in mind that the pigment will fade quicker. This is because oils are coming through your skin constantly. The microblading color becomes diluted by these oils.
If you are a new client with oily skin and have your first microblading procedure done, it is most likely you will need to return sooner than the recommended 1-year touch up. If you have oily or very oily skin and want your color to last longer, then the permanent powder brow, also known as ombre brow, shaded brow, or eyebrow tattoo, is a much better option.
Microblading Aftercare Steps And Recommended Products

Microblading Aftercare For All Skin Types
No matter what your skin type is, there are general aftercare steps that you should follow. Your aftercare may vary depending on your artist’s preferences but it generally will look something like what is listed below. All skin types should follow these steps,
Day 1: You’ll use a cotton pad dampened with water to wipe your microblading every 15 minutes beginning immediately after your procedure. This will prevent scabbing and color loss.
Days 2-7: You’ll use a permanent makeup approved, gentle cleanser with no additives to cleanse your microblading morning and evening. You’ll then apply a permanent makeup healing gel to keep your skin from drying out.
Our Recommended Aftercare Products For All Skin Types
Additional Aftercare Tips for Oily Skin Types
If your skin is oily, then your aftercare will require some additional steps. Your aftercare for oily and combination skin will differ in a few ways. Combination skin should be treated as oily skin if you lean towards having an oily t-zone. You should follow the additional steps listed below as well.
Instead of wiping your microblading with a damped cloth and water ever 15 minutes for 1 day, you will do this for up to 3 days. The extra oils coming through your skin need to be wiped away before they dry into a scab which would result in color loss.
You may not be asked to use a gel at all. A gel is given to you so that your skin doesn’t become too dry. If you have already have oily skin then you aren’t at risk of drying out since your skin does so naturally.
You may be given a light cream in place of heavy cream or gel. There are aftercare creams that are light enough to be used for oily skinned clients however they’re usually not needed.
You should use blotting paper on your microblading for two weeks. Blotting paper is a soft, absorbent sheet of paper that you press against your skin to remove oil. Blotting away excess oils is going to make your microblading heal as crisply as possible. The more oils you leave on your skin, the more blurry your microblading will heal.
Additional Recommended Aftercare Products For Oily Skin
Here Are The Eyebrow Blotting Procedures That Should Be Followed For Each Skin Type
How Do I Determine My Skin Type?
When you schedule your appointment for microblading you do not need to know your skin type. Your microblading artist will determine skin type for you, however, you can use the information above if you are interested in how your microblading eyebrows will heal ahead of time.
Skin type is determined by your genes. Although it may seem as though your environment changes your skin type, true type does not change.
We hope this has helped you to better understand your skin type and how it affects microblading healing. Every client’s needs are unique and we consider this information with great care.

Eyebrow Mapping: How to Measure Your Eyebrows for Microblading
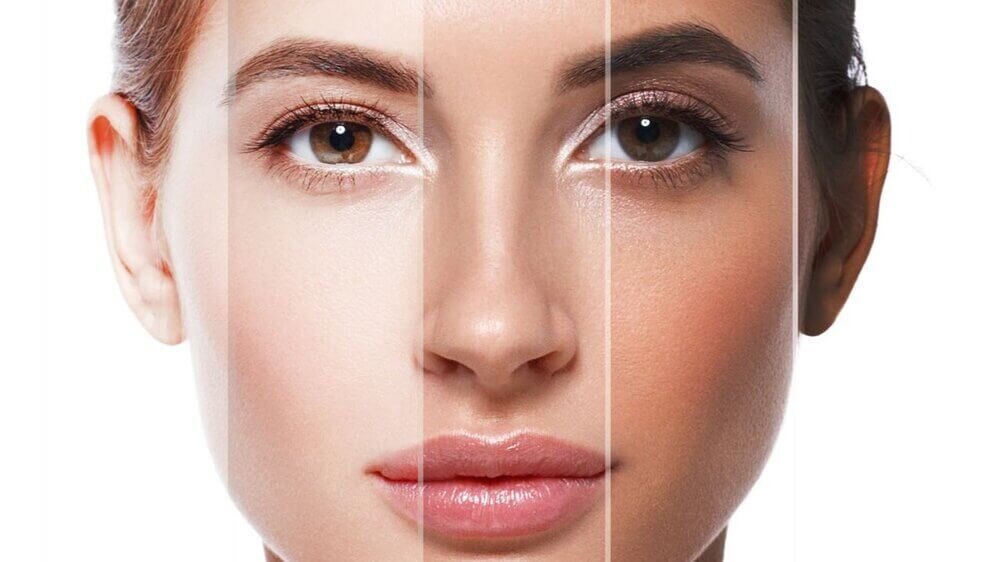
To create your most beautiful eyebrow you must meet The Golden Ratio. You can achieve ideal facial proportions using this ratio and with the help of a highly trained eye.
The Golden Ratio is a mathematical ratio that appears in design and nature. The more closely your face is to this ratio, the more it is perceived as “beautiful”. This is truly math involved and there is a right way to achieve this.
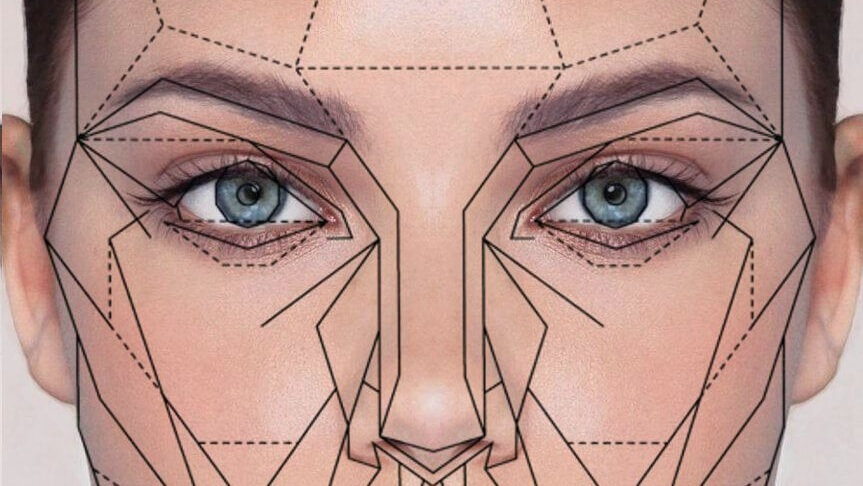
The Golden Ratio For Eyebrow Mapping
To create your most beautiful eyebrow you must meet The Golden Ratio. You can achieve ideal facial proportions using this ratio and with the help of a highly trained eye.
The Golden Ratio is a mathematical ratio that appears in design and nature. The more closely your face is to this ratio, the more it is perceived as “beautiful”. This is truly math involved and there is a right way to achieve this.
Creating your perfect eyebrow with brow mapping is both math and an art. The correct eyebrow shape will frame your face flawlessly and bring out your natural beauty more than ever before.
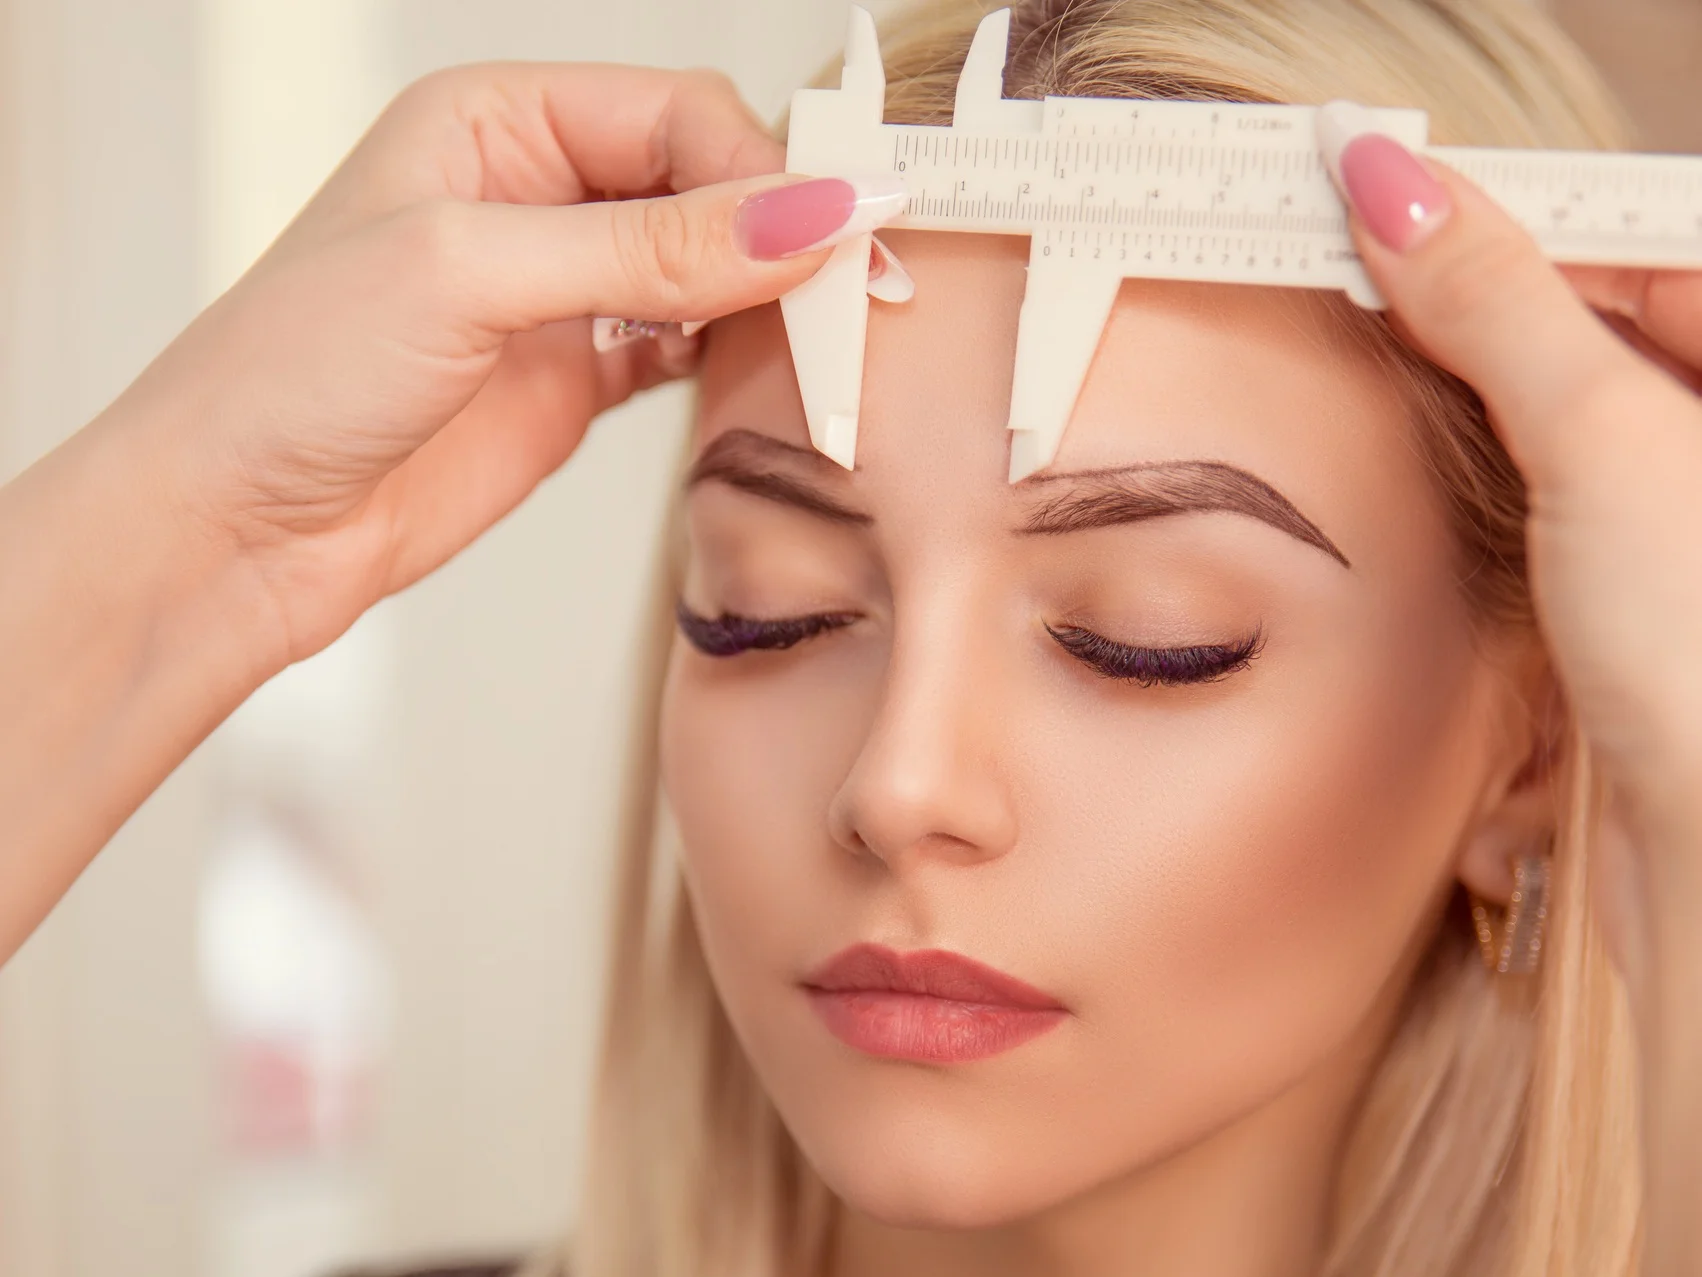
3 Tips to Create Perfect Permanent Eyebrows:
Design an eyebrow shape that is as close to your natural eyebrow as possible.
Your chosen artist will use a series of measurements to accomplish this. If you do not have any eyebrow hair then they will measure according to your facial bone structure. The eyebrow shape will receive your final approval and your artist should spend as much time as needed to get it exactly right.
You never want an eyebrow design to appear too long, short, curved or flat since this can age you.
To find the right shape your artist will pay close attention to the under the arch of your brow and how it flows through to the end of your eyebrow tail. Creating this flow smoothly from head to tail is what will give you your most youthful eyebrow.
Most importantly, the artist must place naturally blended color and strokes proportionately throughout your newly designed eyebrow shape.
This means choosing the perfect color for your eyebrows, using the right amounts, and applying it into your skin at the right depth so it remains semi-permanently for 1-3 years.
Try It At Home
If you want to try shaping your eyebrows according to the Golden Ratio at home, we recommend BeautyNomix’s Golden Ratio Eyebrow Caliper and Eyebrow Stencil Set.

The Importance of Your Microblading Follow Up Appointment
If you’ve just had your eyebrows microbladed then we hope you couldn’t be happier! What’s next? You might think of your annual microblading touch-ups, but there is one more step in your microblading journey before you can get to that. This step is referred to as a Microblading Follow-Up.

Your Microblading Follow Up
If you’ve just had your eyebrows microbladed then we hope you couldn’t be happier! What’s next? You might think of your annual microblading touch-ups, but there is one more step in your microblading journey before you can get to that. This step is referred to as a Microblading Follow-Up.
Why Is This Important?
6 to 10 weeks after your first Microblading appointment you’ll want to return for your Microblading follow up. The follow up is important because it’s what gives you the longest-lasting results. It will also smooth out any imperfections that occurred during your Microblading healing. It is not uncommon for there to be some microbladed hair strokes that didn’t heal with full color. No worries there, because the follow up will take care of that. This is also your opportunity to go darker with the color if you were too nervous to do so during your initial microblading appointment.
Finally, your follow up is a second opportunity to adjust the shape. As a first time microblading client you may have chosen a safer, or thinner, shape than you realized you wanted. Your follow up has you covered. Adjustments to shape and color are done at your request during your follow up. You’ll also find that you’re no longer nervous. You’ve gotten to live with your beautiful new eyebrows for at least six weeks so now you know exactly what to ask for.

“Microblading is always a two step process. Your initial Microblading appointment and your Follow Up.”
Without the follow-up your microblading is incomplete! Your microblading annual touch-ups should occur every 1-3 years for regular maintenance. Your follow-up will give you longer-lasting and more perfect hair strokes so you can keep your beautiful new eyebrows as long as possible.
Looking to Try Microblading Safely At Home Before Committing?
The Waterproof Microblading Makeup Pen mimics microblading to temporarily create natural-looking hair strokes that blend in seamlessly with your own eyebrow hair.

Is Permanent Makeup Safe?
Getting your permanent makeup done is completely safe as long as the salon and artist adhere to all of their Health Department and Center for Disease Control guidelines. Here are some guidelines your artist should be following to ensure there are clean and sanitized conditions and you avoid all risks:

Permanent Makeup Is Safe As Long As…
Getting your permanent makeup done is completely safe as long as your salon and artist adhere to all of their Health Department and Center for Disease Control guidelines. Here are some guidelines your artist should be following to ensure there are clean and sanitized conditions and you avoid all risks:
Everything that touches you during the procedure should be disposed of after the appointment.
All tools, most importantly needles, needle chambers and needle covers need to be factory sterilized and individually packaged before they’re used on you.
Your artist should be strictly using chemical sterilization. This ensures that the equipment is free of microorganisms, bacteria and viruses.
Your artist must be wearing disposable gloves, apron and face mask that is changed before and after your procedure.
While there are no known long-term side effects to permanent cosmetics; short-term effects may include some redness, tenderness, and swelling.
Microblading Safety
Micoblading Safety Checklist :
Microblading tool is individually wrapped and sealed.
The blade part of the microblade is individually wrapped,
The blade part of the microblade is individually certified as sterile
The microblading tool used for your procedure should come individually wrapped and sealed. The blade part of the microblade should also be individually wrapped, but additionally, certified as sterile. You should see a lot number and expiration date on the blade’s packaging. If you do not see these numbers then the needles are not guaranteed sterile and can’t be used.
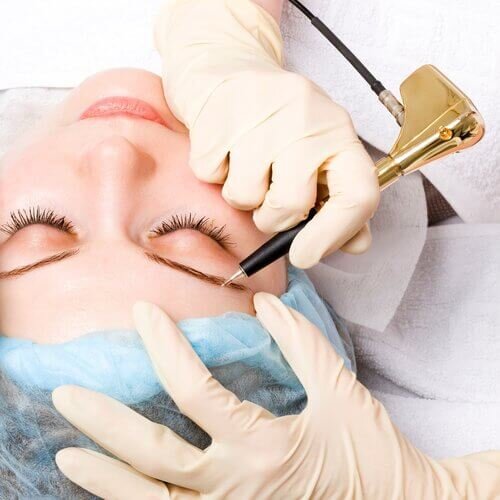
Permanent Eyebrow Tattoo Safety
Permanent Eyebrow Safety Checklist :
The machine is full wrapped
Your needles are sealed in sterile packaging
Your permanent eyebrow tattoo will be done using a machine instead of a hand tool. The machine part of the tool is not disposable so it must be fully wrapped to meet safety guidelines. This wrapping is most often blue but can also be clear and it resembles cellophane.
Your needles must come sealed in sterile packaging. A lot number and expiration date must be visible or else the needles are not safe for use.
Permanent Eyeliner Tattoo Safety
Permanent Eyeliner Safety Checklist :
The machine is full wrapped
Your needles are sealed in sterile packaging
Your position and skin stretching must be correct
Permanent eyeliner tattoo safety begins with the machine being wrapped and the needles being properly sealed as sterile. The needles must of course be stamped with a lot number and an expiration date.
It’s also especially important that you have a well-trained artist to avoid other permanent eyeliner issues. A well trained and educated artist will know how to stretch your skin so that your eye is never exposed to the machine. Client position, stretching techniques, and hand positioning is taught to artists so that you remain safe. Training is the most important when it comes to your permanent eyeliner tattoo safety. Any trained professional will know how to keep you safe at all times.
Permanent Lip Blushing Safety
Permanent Lip Blushing Safety Checklist :
The machine is full wrapped
Your needles are sealed in sterile packaging
Your permanent lip blushing will also be done with a machine. This means you should see blue or clear wrapping covering the machine and anywhere your artist’s hands will go. Your needle must be sealed and opened just before your procedure. Also, you want to look for that very important lot number and expiration date that tells you your needle is guaranteed clean and sterile.
We hope this has helped you to better understand how we make permanent makeup safe for our clients.
Ombre Microblading vs Ombre Powder Brows
If you’ve taken the step towards getting your eyebrows permanently enhanced there are a few new types and terms you’ll come across. It can be confusing, but it doesn’t have to be. We’re going to go over the two most asked about permanent eyebrow techniques and how they compare so that you can make the right choice.

If you’ve taken the step towards getting your eyebrows permanently enhanced there are a few new types and terms you’ll come across. It can be confusing, but it doesn’t have to be. We’re going to go over the two most asked about permanent eyebrow techniques and how they compare so that you can make the right choice.
Ombre Microblading

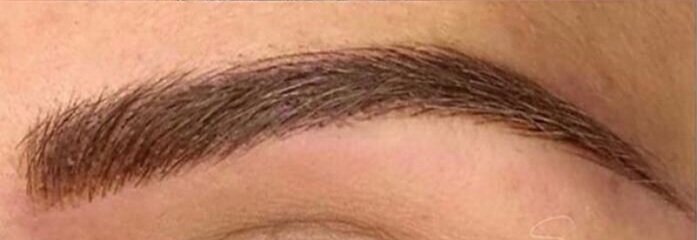
Microblading, also known as Ombre Microblading, is the most natural approach to your permanent eyebrows. The microblading technique involves drawing hair strokes by hand to create realistic and 3-dimensional looking eyebrow hair. These hair strokes will be placed throughout your entire eyebrow but concentrated where you have missing hair. Microblading is technically a “tattoo” since the pigment is deposited into your skin. You should however consider microblading to be an ultra-natural, semi-permanent tattoo since you may need to continue filling in your eyebrows with makeup if eyebrow makeup is something you wear daily.
Microblading, popularly known as hair stroke eyebrows, is going to give you a fuller eyebrow and a more attractive shape without looking like you’re wearing makeup.
If you want to try microblading hair strokes at home first with makeup, we recommend the Waterproof Microblading Pen by Beautyomix:
Ombre Powder Eyebrow or Eyebrow Tattoo
Powder Eyebrow or Eyebrow tattoo, also known as an Ombre Eyebrows, is a fuller approach to permanent eyebrows. This technique is not done by hand like microblading would be, but with a machine. Color is evenly distributed throughout your desired eyebrow shape to give you fuller coverage with this machine. The result will resemble having filled your eyebrows in with topical eyebrow makeup. This powder fill can be done softly so that your eyebrows are still considered very natural, or more layered to give you a fully done, glam look.

Powder Shading or Ombre Brows are going to give you a more dense eyebrow and symmetrical shape, resembling wearing makeup.
If you want to try powder eyebrow at home first with makeup, we recommend the Aesthetica Brow Contour Kit.
The Difference Between Ombre Microblading and Ombre Eyebrow Tattoo:
How long it lasts
Microblading will last you 1-2 years and Powder Eyebrow Tattoo will last you 1.5-5 years.
Ombre Microblading does not last as long as Ombre Powder Eyebrow Tattooing because there is less color saturating your skin. Therefore you will have less color to lose and you will notice it fading more quickly.
Fullness
Only a certain level of fullness can be achieved with Microblading. With Powder Eyebrow Tattooing, the level of fullness and density is nearly endless.
Your Ombre Microblading hair strokes can be placed close, but not on top of each other otherwise you lose the 3-dimensional look of each hair. This is because the strokes require your skin tone to show in between so that they look real. This means that there’s a limit to how much density you can get with microblading since you can’t layer or cross hair strokes.
With Ombre Powder Eyebrow Tattoo, your color is layered. There’s no worry about losing the natural look of your hair strokes since you have none and so middle to maximum density is attainable.
Skin Type
Microblading is best for normal to dry skin types. Powder Eyebrow tattoo is universally best for all skin types.
When getting ombre microblading you want to see crips, clean, healed hair strokes. This is easily achieved if your skin is normal to dry. You may be able to achieve crisp hair strokes if your skin is slightly oily, but you should be prepared for them to heal a little on the softer side. Ombre Microblading on very oily skin however will heal much softer, almost blurred, and it’s going to lighten much more quickly.
It would be best if you either begin with or eventually switch to Powder Eyebrow Tattooing if you are very oily. Otherwise you may have to come back in for touch-ups so often that it won’t be healthy for your skin. This blurring happens because the oil coming through your skin is diluting the hair stroke’s color as it passes through. Ombre Powder Eyebrow Tattoo is best for all skin types.
Can You Get a Combination of Ombre Microblading and Ombre Powder Eyebrow Tattoo?
Absolutely, and it’s a popular choice. Combining Microblading and Powder Eyebrow Shading will give you the best of both worlds. Microblading hair strokes are placed near the front of your brow and along the top of your eyebrow shape while the Powder Eyebrow Shading is placed throughout the center of your eyebrow and along your bottom arch. Combining Microblading and Powder Fill Shading is also called Hybrid Brows.
A Combination Eyebrow is a great way to add some density to your Microblading without worrying about it looking too glam if more of a makeup look is not your style.

The bottom line is that both Microblading and Powder Eyebrow Tattooing are incredibly popular. You really can’t make a bad choice as long as you choose the right artist.
If you are still having a hard time choosing between the two techniques, you can discuss this further with your permanent makeup artist. They should have an understanding of both and how each will heal for your skin to help you make the best choice.
We hope this has helped you to better understand the difference between Microblading and Eyebrow Tattooing or Powder Eyebrow.

How To Find The Best Salon For Permanent Makeup Near You
Unless you’ve had experience with permanent makeup already, you probably feel overwhelmed beginning your search and don’t know which qualifications are important. We’re going to fill you in on what questions you should ask the artist you’re considering when searching for Microblading, Eyebrow Tattoo, Eyeliner Tattoo, and Lip Blushing. These are the top 4 questions you’ll want to ask.

Beginning Your Search: “Find Permanent Makeup Near Me”
Unless you’ve had experience with permanent makeup already, you probably feel overwhelmed beginning your search and don’t know which qualifications are important. We’re going to fill you in on what questions you should ask the artist you’re considering when searching for Microblading, Eyebrow Tattoo, Eyeliner Tattoo, and Lip Blushing. These are the top 4 questions you’ll want to ask.
4 Questions You Want To Ask Before Choosing Your Artist:
1. Can I see pictures of your work?
Ask to see your artist’s portfolio. A portfolio is proof of an artist’s skill in pictures. This allows you to judge the artist’s talent and style. Make sure you see a photo of the style that you want. Don’t be afraid to ask to see pictures with your specific hair color or skin type. You want proof that the artist is an expert and that they know how to choose the correct pigment for their clients. Pigments are what artists use as the color. The same pigment on two clients will look very different depending on their skin type or skin tone. Color choice is it’s own science and your artist should know their pigment line through and through. Top artists keep a portfolio of women of all ages, natural hair colors and ethnicities. You should feel confident when you’ve selected your artist because you’ve seen their photos, and you know exactly what you’ll be getting.
2. Where did you train?
In most areas of the world it’s easy for someone to begin working as a permanent makeup artist. That’s right, we said easy. There is no requirement to have formal artistic training or experience before setting up shop. Scary, we know. This means that while they may be required to know how to safely handle and dispose of their products and tools, they could be untrained as an artist. You should feel safe when having your permanent makeup done. Making sure your artist is trained is how you avoid a bad permanent makeup job.
Remember we mentioned that choosing pigment color is a science? Color selection is just one of the many lessons an artist needs to learn before they’re working on a real client. It’s only through additional training that they can learn these skills. This education comes at the expense and time of the artist which is why some will skip it and just go straight to working on clients to make money quickly.
You should ask where your artist’s training was done and when their last course was taken. Permanent makeup is always a growing and evolving field and recent training is required to keep up with the latest developments.
3. Do you have testimonials or good reviews?
You should see what their past clients have to say. Word of mouth and an artist that’s recommended by others is incredibly helpful when making your choice. If they have been working in the permanent makeup field for long enough, they should have the good reviews to show it.
4. Do you provide me with all aftercare supplies?
Find out what they will require of you after your service. Your aftercare will vary depending on the artist’s preference. You’ll want to see that they have a healing plan ready for you. Not all artists provide a complete aftercare kit for their clients. A complete aftercare kit includes full instructions, what to expect while healing, and any pads, cleansers, creams or gels that they want you to use. If they don’t provide a full aftercare kit for you, then you’ll at the very least want to get this list ready so that you can purchase the items needed.
Click to get our most recommended aftercare kit items for Microblading, Eyebrow Tattoo, Eyeliner Tattoo, and Lip Blushing.
Finding Permanent Eyebrow Tattoo Near Me
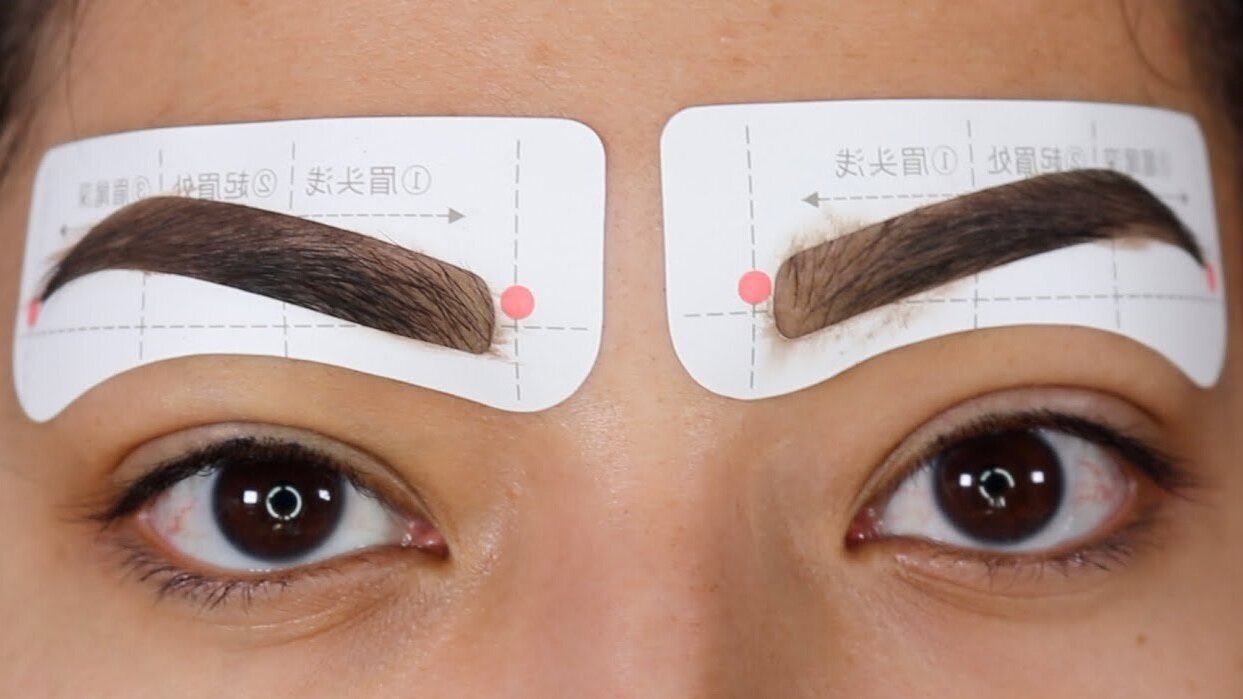
Using stencils isn’t wrong as a starting point but they can be a quick way to get cookie cutter eyebrows. The artist should make adjustments to the outline to suit you.
Have you ever heard the term “cookie-cutter eyebrows?” Cookie-cutter eyebrows are known in the permanent makeup industry for when an artist does the same shape on every single client. Unfortunately this has become a huge trend amongst beginner artists who want to only do what they like or what is popular on social media. Cookie-cutter brow artists will choose one, very specific shape and size, and that’s exactly what every client gets. This is unlikely to work out unless you happen to have the exact facial size, structure and natural brow that the artist has become “known for.”
Be wary of this during your search. If you see the same shape on every single client from their before and after photos then this is the shape you will get. We highly suggest that you search for an artist that will adjust and measure your eyebrows according to your best features, your natural hair growth, and your wants and long term needs.
Finding Eyeliner Tattoo Near Me
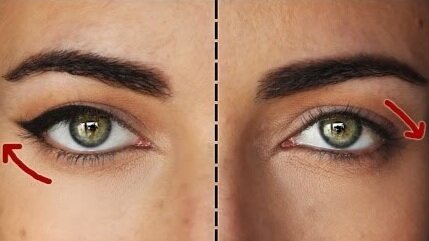
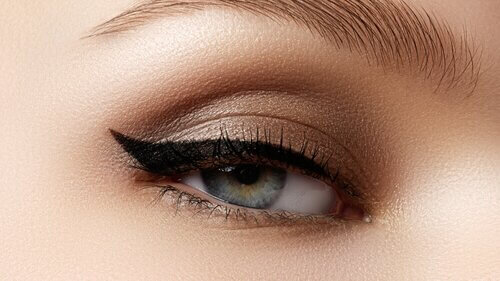
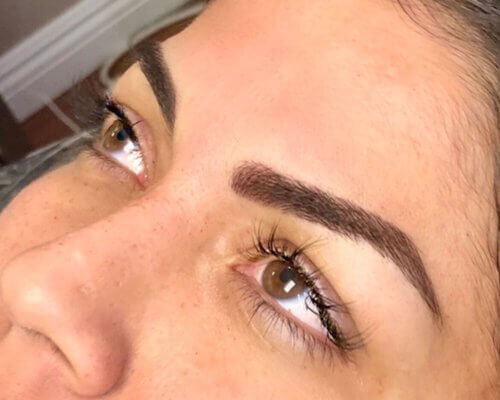
The eye on the left shows you a well placed wing that lifts the outside of the eye up. You’ll notice that the eye on the right looks to be more downward and droopy. It looks less youthful.
When you’re searching for an artist to do your permanent eyeliner tattoo you’ll often see gorgeous before and after photos at slanted angles and freshly done. It’s easy to post a photo of only one side of an eyeliner and place it at an angle with a filter. This is a great way to schedule many excited new clients when your work is uneven or subpar. What’s difficult to show in a photo is a side by side of both eyes at an even angle, and without the use of photoshop filtering. This is what you want to actively search for.
Make sure you see photos of both sides of the eyeliner. They should be exactly even and in no way drooping along the outsides of the eyes. Drooping eyeliner wings now means heavily drooping wings later. Wings are what you would call the outside of the eyeliner where your smile lines form. As skin ages, this skin naturally droops. Drooping eyeliner will age you.
Finding Lip Blushing Near Me

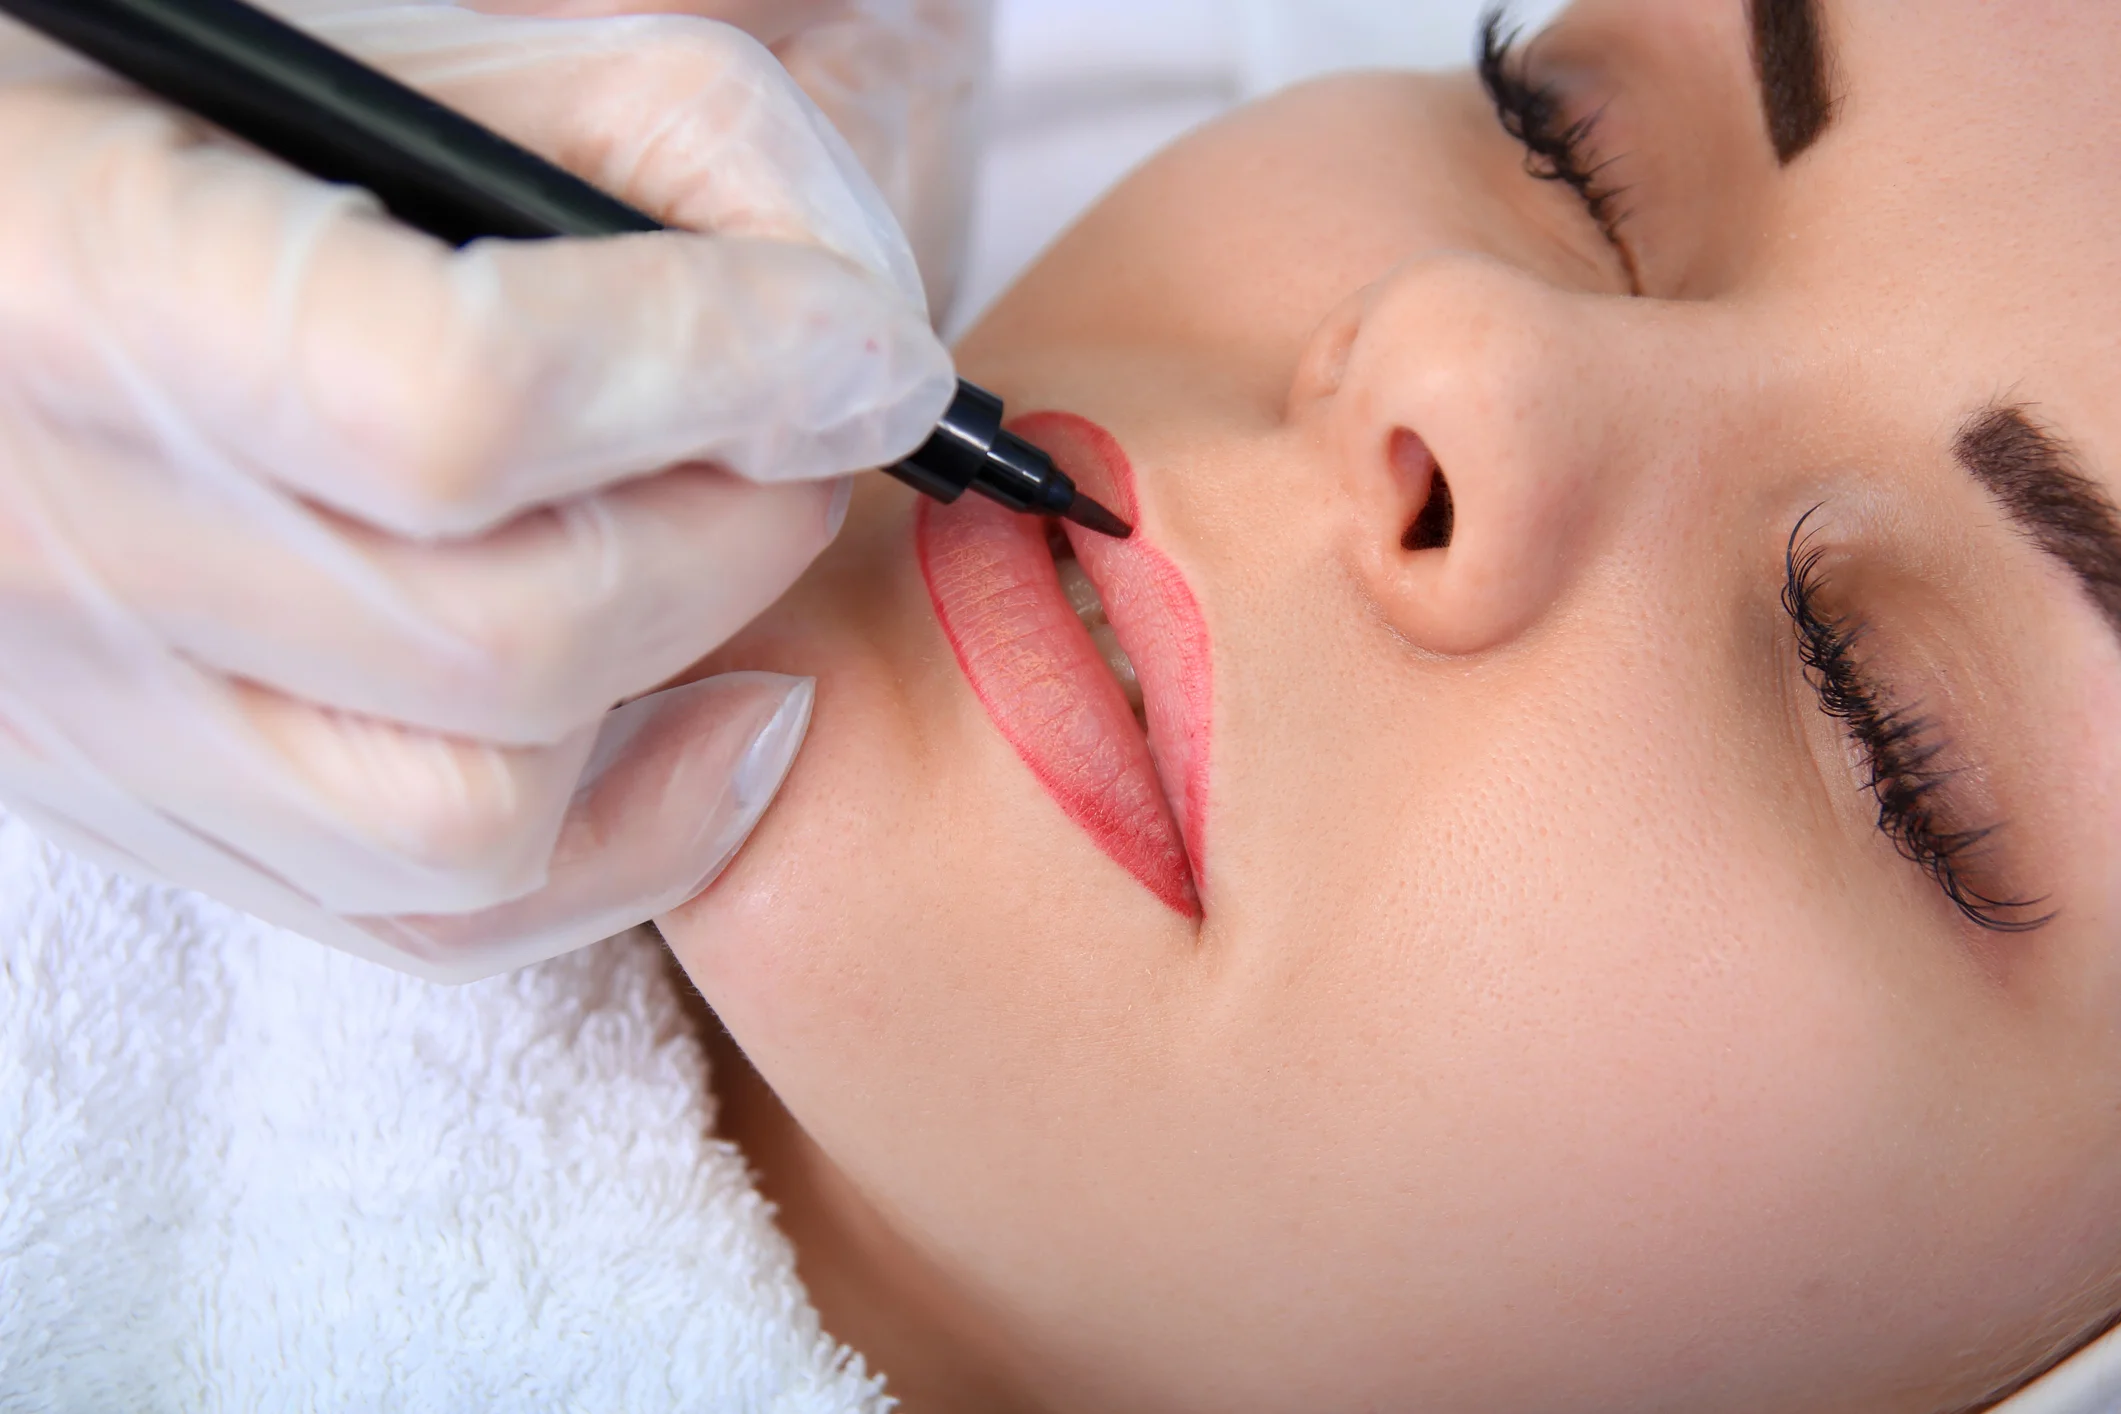
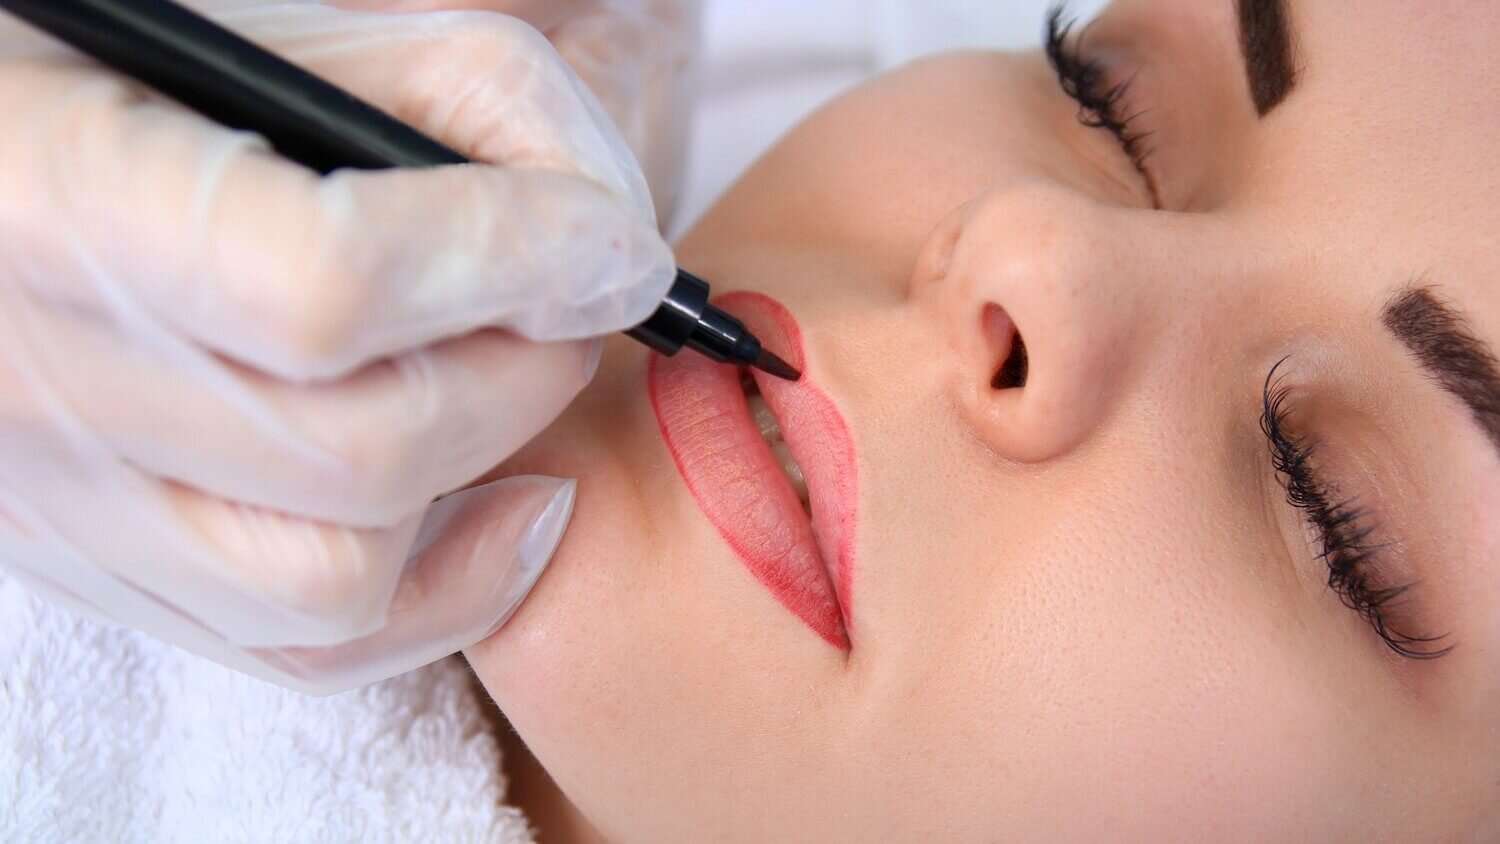
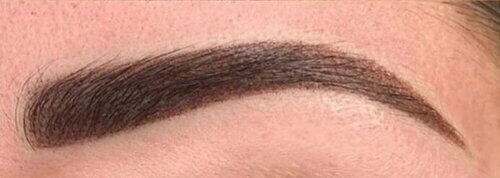
This permanent lip blushing is healed. You’ll notice the color looks more like a stain than a topical lipstick. You might also notice that the color is uneven and will require another appointment to smoothen out.
Lip Blushing and Permanent Lip Color Tattoo is notorious for having healing issues for new artists when it comes to color. You want to see healed before and after photos instead of immediately after photos of your artist’s work. It can be difficult to tell when a photo was taken but if you notice any amount of lip swelling, redness, or color that looks topical instead of healed in the skin, then this photo was likely taken immediately after the client’s procedure and therefore not the true result. This is why you must see the artists healed lip blushing photos before booking.
You shouldn’t be afraid to ask questions or schedule an in person consultation. These are your only eyebrows, eyes and lips and these procedures are long lasting.

We hope this has helped you to feel more confident during your search for the best permanent makeup artist near you.